通过腾讯云轻量+对象存储 cos,搭建 nextcloud 私有云盘。
通过腾讯云轻量+对象存储 cos,搭建 nextcloud 私有云盘。
1,创建或者登录腾讯云账号。绑定我们服务链接,还可以再打个折! (个人签名可联系)
2,购买腾讯云轻量应用服务器,目前有活动。
-
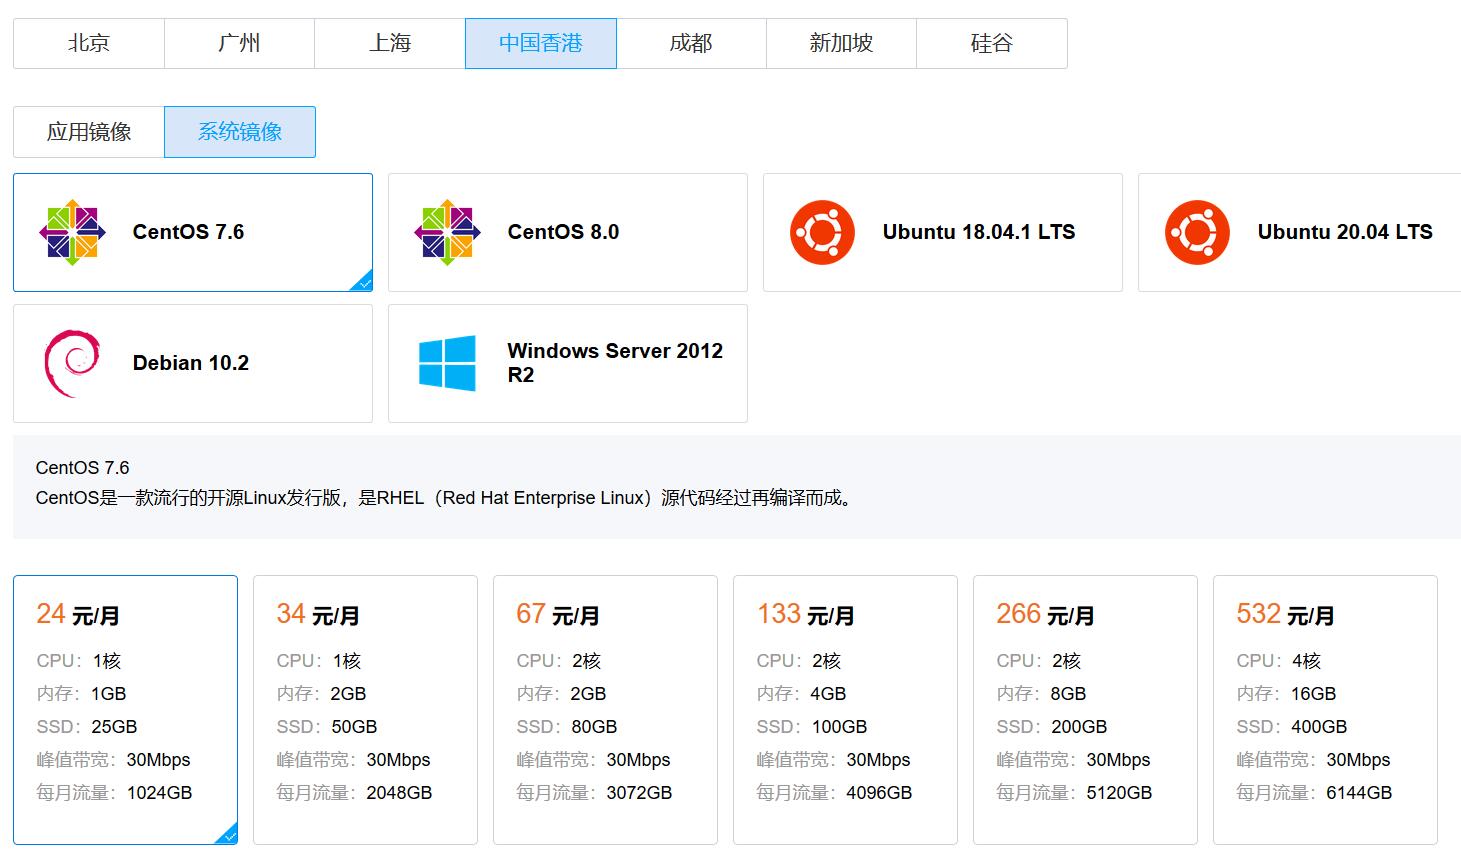
腾讯云轻量应用服务器中国香港机房配置和价格
-
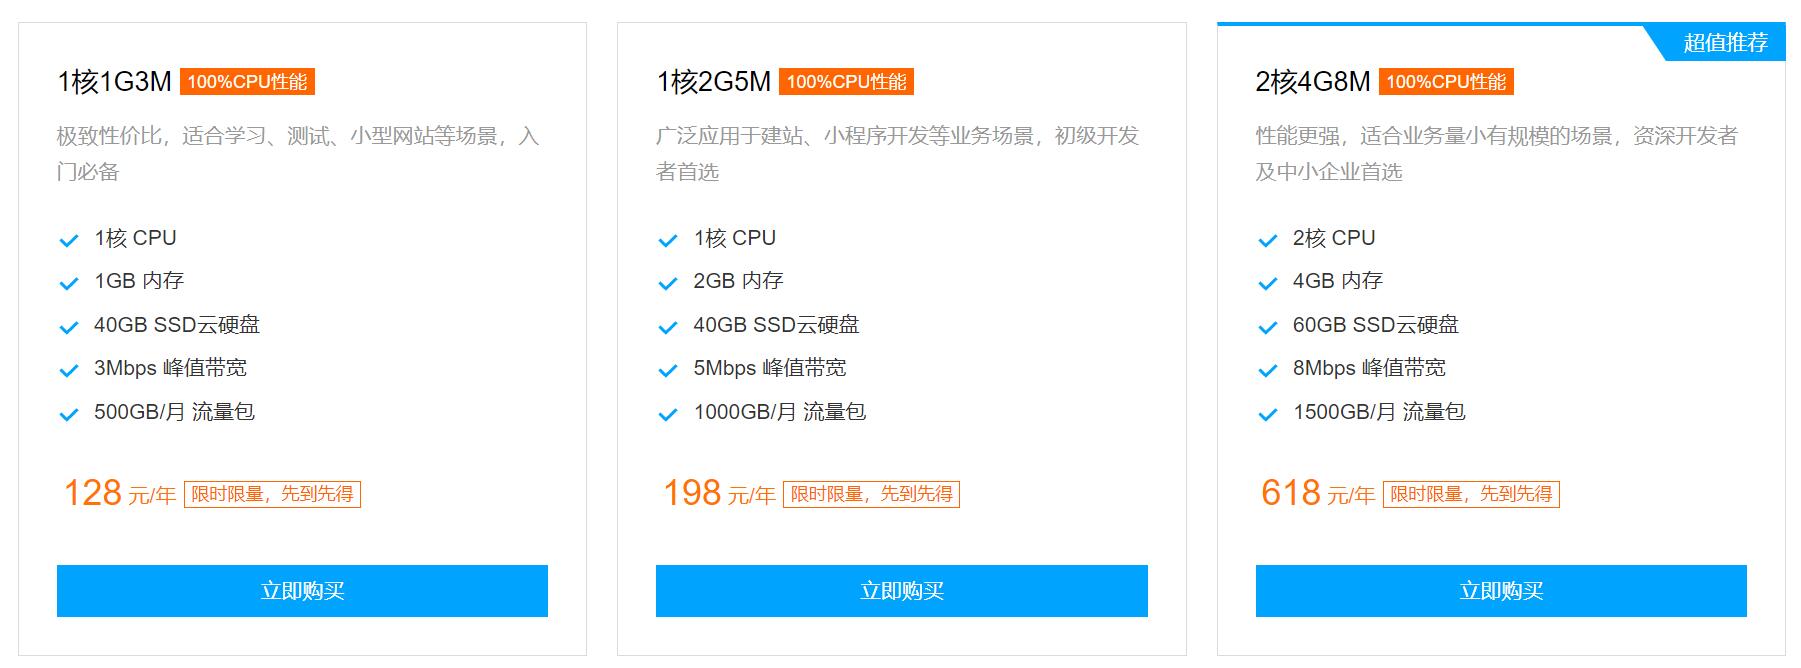
腾讯云轻量应用服务器北京 /广州 /上海 /成都机房购买 1 年活动
-
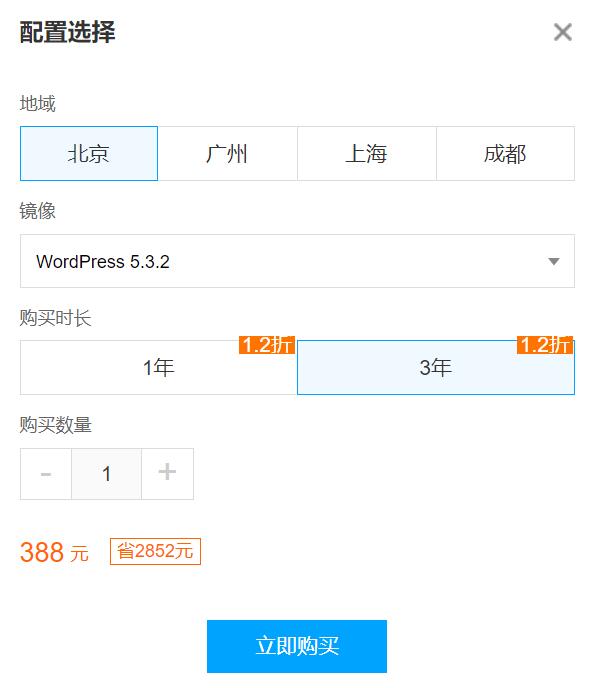
腾讯云轻量应用服务器北京 /广州 /上海 /成都机房购买 3 年活动
3,创建 对象存储 cos 存储桶。所属地域选择和轻量相同地域。
目前,个人用户有免费 6 个月 50GB 的标准存储容量,企业用户有免费 6 个月 1TB 的标准存储容量。 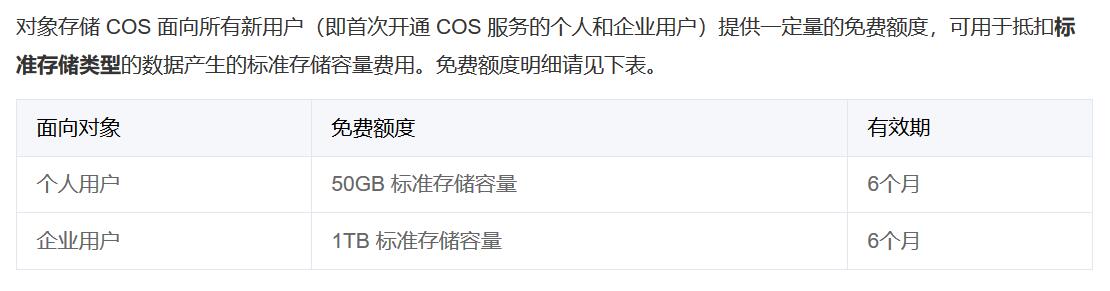
4,测试腾讯云轻量应用服务器与对象存储 cos 存储桶之间的访问是否是通过内网访问。目前,对象存储 cos 内网流量免费。
安装 nslookup 命令
-
Debian / Ubuntu
shell> apt-get install dnsutils -
RedHat / Fedora / Centos
shell> yum install bind-utils
通过 nslookup 命令,查看存储桶访问域名的解析 IP 来判断轻量是否通过内网来访问。
shell> nslookup 存储桶访问域名(类似:xxxxxx 。cos 。ap-xxxxxxx 。myqcloud 。com )
如果解析出来的 IP 地址是内网地址或者保留地址,那么是通过内网来访问。
5,搭建 nextcloud 的运行环境。
6,下载并上传 nextcloud 到网站目录。
7,配置 nextcloud 网站 config 目录下 config.php 文件。
先备份 config.php 文件,然后清空原有的内容并输入如下内容并根据注释修改相关的值。
shell> cp config.php config.php_bak shell> vi config.php
<?php $CONFIG = array( 'objectstore' => array( 'class' => '\OC\Files\ObjectStore\S3', 'arguments' => array( 'bucket' => 'nextcloud-1250000000', // 存储桶名称(空间名称) 'autocreate' => false, 'key' => 'AKIDxxxxxxxx', // 替换为用户的 SecretId 'secret' => 'xxxxxxxxxxxx', // 替换为用户的 SecretKey 'hostname' => 'cos.<Region>.myqcloud.com', // 将 <Region> 修改为所属地域,如 ap-shanghai 'use_ssl' => true, ), ), ); 
8,登录 nextcloud 的访问地址,并安装 nextcloud
9,文件上传测试。测试结果仅供参考。